Categories
Blog

How Electric Motor Rewinding Helps Revive your Motor

Have you ever experienced motor failure at the most inconvenient time? Of course, who hasn’t? Whether it’s in your commercial HVAC system, on the factory floor, or even at home, a malfunctioning motor can bring life to a screeching halt. Now, what if we told you that there’s a way to bring that seemingly dead motor back to life? Intriguing, right? Welcome to the world of electric motor rewinding. Electric motor rewinding is not just a revival tactic; it’s also a strategy that can save significant costs. Picture this: instead of investing a hefty sum in a brand new motor, you could restore the functionality of your current one. This approach is often quicker and certainly more cost-efficient. It’s akin to replacing the heart of the motor while preserving the body. However, not all motor repair services are created equal. Choosing a reliable and experienced company for motor rewinding can mean the difference between motor efficiency, and having a motor that merely limps along. That’s where we come in. With years of expertise in the field, our team at Advanced Air & Vacuum (AAV) is here to guide you through the world of electric motor rewinds. As we dive into the specifics of how a successful rewind can breathe new life into your motor, you’ll discover our commitment to quality, efficiency, and customer satisfaction. So, let’s switch gears and get into the details of electric motor winding. 

Understanding Motor Rewinding

Let’s illuminate the somewhat mystical concept of motor rewinding. At its core, motor winding—whether it’s a phase motor or DC motor—refers to the process of replacing the copper coil or ‘motor coils’ inside the motor terminal—a coil which, when energized, forms the motor’s magnetic field and generates its power. Over time, this coil may suffer faults or thermal deterioration, necessitating a rewind.

So, why does a motor require rewinding? It could be due to several reasons: the motor could have failed due to overloaded conditions, aging, or an unfortunate voltage surge. In such cases, the internal coil winding, or ‘faulty winding’, may burn out or become damaged, compromising the motor’s performance. Thermal deterioration is also a common enemy of motor longevity. Heat can degrade the insulation around the wire winding, leading to internal short circuits. In each of these scenarios, a motor rewind or electric motor repair can rectify the issue, effectively giving your motor a new lease on life.

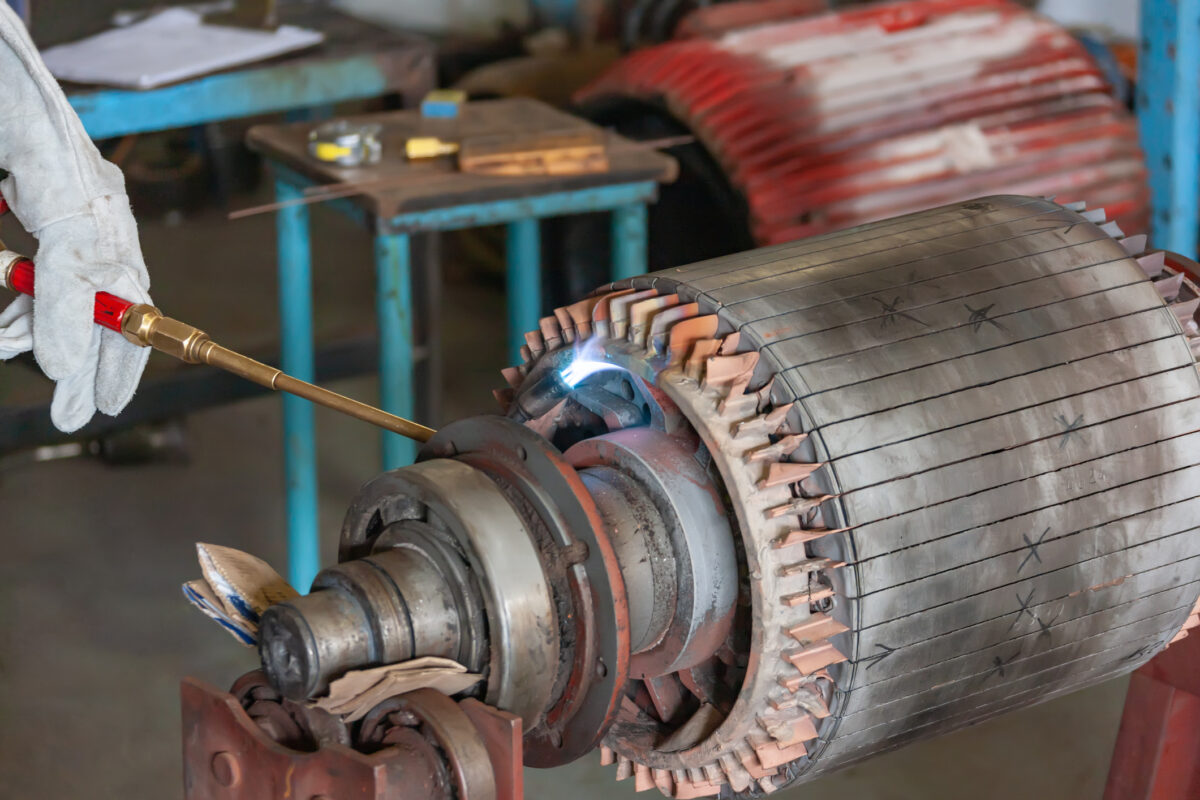
Diving into the nitty-gritty of the process, the motor rewind involves several key components: the core material or ‘stator core’, insulation resistance, and the magnetic field, which is a critical component. First, the old, damaged coil is carefully removed, and the stator core is inspected and repaired if necessary. A ‘new winding’ is then wound onto the core, and high-quality insulation is applied to resist heat and prevent electrical failures. The focus is to maintain the motor’s original magnetic field characteristics, ensuring its performance, even at a higher speed, is not diminished after the rewind. With variable frequency drive, this might sound straightforward, it requires a keen understanding of the motor’s specifications and meticulous execution.

Best practices in motor rewinding involve the correct selection of wire gauge, precise winding techniques, and the use of high-quality insulation material. All these steps play a crucial role in ensuring the rewound motor works efficiently and maintains its longevity. This is why the skills of the repair technician are paramount. An experienced technician understands the intricate details of motor design and can perform the rewind to meet, or even exceed, original equipment manufacturer (OEM) specifications. In the next section, we will explore the tangible benefits that come with choosing motor rewinding over buying a new one. Stay tuned!

Benefits of Electric Motor Rewinding

Now that we have unveiled the mechanics behind electrical motor rewinding, let’s switch our focus to its array of benefits. Opting for motor rewinding, instead of purchasing a new one, presents a multitude of advantages, chief among them being significant cost savings. A rewind is typically a fraction of the cost of a new motor. Just think of it in terms of a heart transplant – it’s far more cost-effective to replace the heart than the entire body. The same principle applies here. By replacing only the damaged winding head or the ‘faulty winding’ and leaving the motor body intact, you are effectively saving on the costs associated with manufacturing and installing a completely new motor. But the benefits aren’t purely financial.

Motor rewinding also makes a substantial contribution towards environmental sustainability. In a world where reducing carbon emissions and waste is a top priority, motor rewinding offers an eco-friendlier option than replacing the entire motor. When you choose to rewind, you’re saving the bulk of the motor from landing in a landfill. Additionally, the energy consumed in producing a new motor far exceeds that used in the rewinding process. A rewind can also preserve the unique qualities of your motor. Many motors in service today are older models, built with a level of craftsmanship and materials that simply can’t be replicated with modern manufacturing techniques. In such cases, a rewind allows you to maintain the motor’s original robustness and reliability. It’s essential, however, to remember that the success of a rewind largely depends on the skills of the repair technician and the quality of the materials used. Remember, unequal voltage and temperature can affect the performance of a ‘permanent magnet’ motor. In the next section, we’ll introduce you to a team that guarantees quality rewinds – the experts at Advanced Air & Vacuum. 

The Advanced Air & Vacuum Advantage

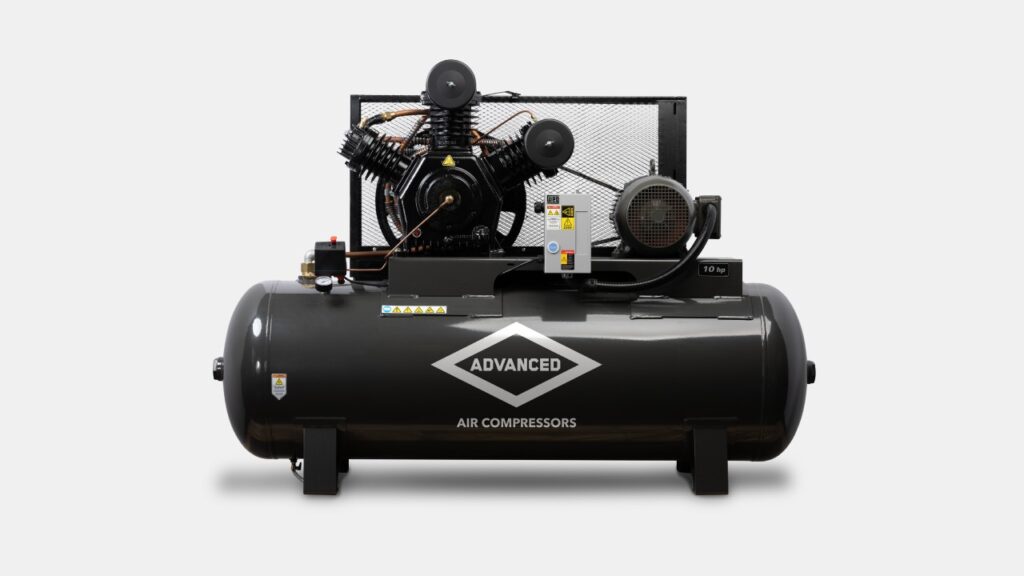
When it comes to motor rewinding, Advanced Air & Vacuum (AAV) stands as a beacon of excellence and reliability. As specialists in motor repairs and services, we’re committed to providing superior service, high-quality materials, and expert craftsmanship that ensures your rewound motor runs smoothly and efficiently. AAV is not just any service center; we’re a team of dedicated experts specializing in air compressors, vacuum pumps, and, of course, motor rewinding.

With years of experience under our belts, we’ve fine-tuned our skills to tackle any repair or rewind job, big or small, simple or complex. But what really sets us apart is our authorized service center status for leading brands. This stamp of approval not only represents the trust placed in us by industry giants, but it also reflects our commitment to staying current with the latest industry trends and technical advancements. Our technicians are regularly trained and updated with the latest practices, ensuring that every motor rewind meets or surpasses original equipment manufacturer (OEM) standards.

Our focus extends beyond just providing a service; we’re also committed to customer education and satisfaction. We believe in transparent communication and keeping our customers informed at every stage of the process. It’s part of our goal to build strong, long-term relationships based on trust, integrity, and mutual respect. So, if you’re in need of motor repair services, and particularly motor rewinding, remember that AAV is ready and equipped to offer superior service. In the next section, we’ll wrap up the discussion and outline the steps to take if you decide to give your motor a new lease on life through rewinding.

Electric motor rewinding is a smart, cost-effective, and sustainable solution for dealing with motor failures or deteriorations. It breathes new life into your motor, preserving its unique qualities, and reducing waste. However, the success of a motor rewind largely hinges on the skills of the technician and the quality of the materials used.

This is where Advanced Air & Vacuum steps in. As a trusted and authorized service center for many leading brands, our expertise in motor rewinding is unrivaled. We’re not just here to offer a service; we’re committed to providing a superior customer experience, characterized by transparency, education, and satisfaction. Don’t let a malfunctioning motor slow you down. Whether it’s an air compressor, vacuum pump, or another type of motor, reach out to us at AAV. Our team of experienced professionals is ready to give your motor a new lease on life. Contact AAV today for more information!

Categories
Blog

Air Compressor Gauges: What to Know

Air compressor gauges play a crucial role in ensuring the efficient and safe operation of air compressors. These gauges provide valuable information about the pressure levels within the compressor tank and the output pressure being delivered to various tools and equipment. By monitoring these pressure readings, users can maintain optimal performance, prevent equipment damage, and ensure the safety of both operators and the surrounding environment. Air compressor gauges allow for precise adjustments of pressure settings, enabling users to match the requirements of specific tools and applications. Additionally, they serve as essential diagnostic tools, indicating any potential leaks, blockages, or malfunctions within the compressor system. With accurate and reliable gauges, operators can make informed decisions, optimize productivity, and maintain the longevity of their air compressors. 

What is an Air Compressor Gauge?

An air compressor gauge is a measuring instrument specifically designed to monitor and display the pressure levels within an air compressor system. It serves as a visual indicator, typically featuring a dial or digital display, that shows the current pressure reading in pounds per square inch (PSI) or other applicable units of measurement. The primary purpose of an air compressor gauge is to provide users with accurate and real-time information about the pressure conditions within the compressor tank and the output pressure being delivered to connected tools and equipment. This information is crucial for maintaining optimal performance, preventing equipment damage, and ensuring safe operation. By monitoring the gauge, operators can adjust pressure settings, detect abnormalities or deviations, and take appropriate action to troubleshoot and maintain the efficiency of the air compressor system.

A typical air compressor gauge consists of several key components designed to accurately measure and display pressure levels. The gauge is housed in a durable casing, often made of metal or plastic, to protect its internal mechanisms. At the heart of the gauge is a pressure sensing element, commonly a Bourdon tube or diaphragm, which reacts to changes in pressure by moving or deforming. This motion is then transmitted to a mechanical linkage or a digital sensor, which converts it into a readable pressure value. The gauge usually features a dial or digital display with clear markings denoting the pressure units, such as PSI or bar. A needle or numerical display provides the actual pressure reading. You’ll find that most air compressor gauges incorporate a pointer stop or a peak hold mechanism to retain the highest pressure reached. The gauge may also include a calibration screw or knob for adjusting the accuracy of the readings. Overall, the design of an air compressor gauge ensures durability, accuracy, and ease of reading, enabling operators to monitor pressure levels effectively and make informed decisions based on the displayed information.

Are there Different Types of Air Compressor Gauges?

There are several different types of air compressor gauges available, each with its own unique features and applications. One common type is the analog gauge, which uses a mechanical system to display pressure readings on a dial. Analog gauges are straightforward to read and offer a wide range of pressure measurement options. Another type is the digital gauge, which utilizes electronic sensors to provide precise and accurate pressure readings in a digital format. These gauges often offer additional features like backlighting and the ability to switch between different units of measurement. Furthermore, there are combination gauges that combine analog and digital displays, allowing users to choose their preferred method of reading the pressure. Specialty gauges, such as differential gauges, are designed to measure the difference in pressure between two points within the air compressor system. These gauges are commonly used for diagnostic purposes and troubleshooting. Additionally, some gauges come with integrated pressure switches, which allow for automatic control of the compressor’s on/off cycles based on preset pressure thresholds. The availability of different types of air compressor gauges ensures that you can select the most suitable one for your specific needs and preferences.

How does an Air Compressor Gauge Work?

The functioning of an air compressor gauge is relatively straightforward. The gauge is connected to the air compressor system through a pressure line or port, allowing it to measure the pressure inside the system. When the compressor operates, it generates compressed air, which builds up pressure in the tank or reservoir. This pressure is transmitted to the gauge through the connection, causing the gauge’s sensing element, such as a Bourdon tube or diaphragm, to deform or move in response to the applied force. As the sensing element moves, it activates a mechanical linkage or digital sensor that translates the motion into a readable pressure value. The resulting pressure reading is then displayed on the gauge’s dial or digital screen, allowing users to monitor the pressure levels in real-time. By observing the gauge, operators can adjust the compressor’s settings, detect any abnormal pressure conditions, and take appropriate action to maintain safe and efficient operation. An air compressor gauge functions by converting the applied pressure force into a visual representation that enables users to monitor and control the pressure within the system.

Understanding Pressure Measurement and Units Used in Air Compressor Gauges

Pressure measurement is an essential aspect of air compressor gauges as it provides crucial information about the force exerted by compressed air. Pressure is defined as the amount of force applied to a given area, and it is commonly measured in pounds per square inch (PSI) or bar. In an air compressor gauge, the pressure measurement is typically indicated by a needle on an analog dial or displayed numerically on a digital screen. The gauge’s sensing element, such as a Bourdon tube or diaphragm, reacts to the applied pressure and translates it into a readable value. The PSI unit is commonly used in air compressor gauges, especially in North America. It represents the force exerted by one pound of pressure per square inch of area. The scale on the gauge dial is marked with increasing PSI values, allowing users to observe and adjust the pressure levels accurately. Another widely used unit of pressure is bar, commonly used in Europe and many other parts of the world. One bar is equivalent to approximately 14.5 PSI. Air compressor gauges that use the bar unit will have the corresponding scale displayed on the gauge dial or digital screen. Additionally, there are other units of pressure used in specific industries or applications. For instance, kilopascal (kPa) and megapascal (MPa) are commonly used in scientific and engineering contexts. These units offer a more precise measurement of pressure, with 1 MPa equivalent to 1,000,000 pascals or approximately 145 PSI. It is important for users of air compressor gauges to understand the units being used and ensure that they match the requirements of their specific tools and applications. Properly monitoring and adjusting the pressure levels within the compressor system is vital for efficient operation, equipment safety, and optimal performance.

What is the Gauge’s Role in Air Compressor Systems?

Air compressor gauges play a vital role in ensuring the efficient and optimal performance of air compressors. They enable users to regulate and adjust the pressure levels within the compressor system, ensuring that the desired pressure is maintained for optimal operation. By matching the pressure output to the specific requirements of tools and equipment, operators can achieve efficient performance and prevent potential damage. Additionally, air compressor gauges serve as diagnostic tools by detecting pressure loss or fluctuations, indicating potential leaks in the system. Monitoring the pressure readings on the gauge helps identify issues such as clogged filters or worn-out valves, allowing for timely maintenance and repairs to maintain efficiency. Furthermore, gauges prevent overloading by providing clear indications of pressure levels, preventing excessive strain on the motor and ensuring optimal performance. Overall, air compressor gauges facilitate precise pressure control, prevent system issues, and contribute to the overall efficiency and longevity of air compressors.

Recommended Pressure Ranges for Air Compressor Gauges

Recommended pressure ranges can vary depending on the specific application and the tools or equipment being used, so it’s important to consider the recommended PSI specific to each use case. In industrial applications and settings, pneumatic tools like impact wrenches generally operate well within a range of 90-120 PSI (6.2-8.3 bar). For automotive applications, standard tire inflation typically requires gauge pressures ranging from 30-35 PSI (2.1-2.4 bar), but it is important to refer to specific tire pressure recommendations. Paint sprayers usually operate effectively between 30-50 PSI (2.1-3.4 bar), while airbrushing for artistic purposes typically requires lower pressures in the range of 15-25 PSI (1-1.7 bar). Each air tool, such as nail guns or pneumatic drills, may have its own specific pressure range, so referring to the manufacturer’s instructions or specifications is crucial. These recommended pressure ranges serve as guidelines to ensure safe and optimal performance based on industry standards and specific tool requirements.

How to Maintain your Air Compressor Gauge

Maintaining and cleaning an air compressor gauge is essential to helping extend the life of your air compressor gauge and ensure its accuracy and reliability in monitoring pressure levels. In doing so, here are some tips to keep in mind:

Regular Inspections: Perform routine visual inspections of the gauge to check for any signs of damage, such as cracks, dents, or loose parts. Address any issues promptly by replacing or repairing damaged components.

Cleanliness: Keep the gauge and its surrounding area clean. Regularly wipe the gauge with a soft, lint-free cloth to remove dust, dirt, and any other debris that may accumulate on the dial or digital display. Avoid using harsh chemicals or abrasive cleaners that can damage the gauge’s surface.

Avoid Moisture and Condensation: Moisture can affect the accuracy of the gauge and lead to corrosion. Take measures to prevent moisture buildup by ensuring proper ventilation in the compressor area, addressing any leaks in the system promptly, and using moisture traps or separators in the air compressor setup. 

Avoid Excessive Vibration: Excessive vibrations can impact the gauge’s accuracy and durability. Securely mount the gauge to minimize vibrations and use rubber or foam padding as necessary to dampen any vibrations from the compressor or surrounding equipment.

Common Issues with Air Compressor Gauges

While air compressor gauges are generally reliable, they can experience a few common problems. Here are some typical issues and their potential solutions:

1. Inaccurate Readings: One common problem is inaccurate pressure readings on the gauge. This could be due to gauge calibration issues or damage to the internal components. To address this, first, ensure that the gauge is properly calibrated by following the manufacturer’s instructions. If recalibration doesn’t resolve the issue, consider replacing the gauge with a new one.

2. Gauge Damage: Gauges can be subject to damage from impacts, vibrations, or environmental factors. Cracked or broken dials, damaged glass, or loose components can compromise the accuracy and functionality of the gauge. If the damage is minor, it may be possible to repair or replace the damaged parts. However, significant damage may necessitate replacing the gauge entirely.

 3. Pressure Leaks: Air compressor gauges can develop leaks at the connection point or around the threads. This can result in inaccurate readings or the gauge failing to hold pressure. To address this issue, inspect the connections and tighten them securely. If there are still leaks, apply thread sealant tape or use a compatible thread sealant compound to create a tight seal. In some cases, replacing the gauge or the faulty components may be necessary.

4. Condensation or Moisture Buildup: Moisture can accumulate inside the gauge, affecting its accuracy and potentially causing corrosion. To mitigate this, ensure proper ventilation in the compressor area, use moisture traps or separators in the air compressor system, and perform regular maintenance to remove any accumulated moisture.

5. Stuck Needle or Display: Sometimes, the gauge needle or digital display may become stuck or unresponsive, preventing it from providing accurate readings. Try gently tapping or nudging the gauge to see if the needle or display responds. If the problem persists, the gauge may require repair or replacement.

Having regular maintenance, proper calibration, and addressing issues promptly are key to resolving problems with air compressor gauges. If the problems persist or if there are safety concerns, reach out to AAV and one of our qualified professionals will be more than happy to help you!

Categories
Blog

CFM Vs SCFM: What’s the Difference?

When you’re searching for an air compressor, you may see a couple of different terms used to measure air flow rate, specifically CFM and SCFM. Though they’re somewhat similar, one is based on actual cubic feet at actual conditions, while the other is measured in standard cubic feet, which requires a standard condition of standard barometric pressure at a specific actual temperature and humidity. This can make a strong difference if you’re at high altitudes, have a different relative humidity, or are at a different ambient temperature.

In some situations, such as using high-demand equipment, scientific equipment, or precision equipment, these readings make a big difference in how much mass flow your air compressor receives, impacting CFM available in your pressurized air lines. In this post, we’ll get into the details of the differences between these two types of measurements, what each one will entail, and how they are calculated in case it’s important to your work.

What is SCFM?

SCFM stands for standard cubic feet per minute, a measurement of airflow at a standard temperature, standard atmospheric pressure, and standard humidity. Because these conditions are carefully controlled, they produce a very precise reading of the volumetric flow rate of an air compressor. For this reason, this calculation uses the same formula for both the American Society of Mechanical Engineers (ASME) and the Compressed Air and Gas Institute (CAGI) standards across different industries.

The requirements for SCFM rating are as follows, with usual United States units (non-SI units) listed first:

  • Absolute pressure of 14.7 PSI or 1 Atmosphere
  • Air temperature of 68 degrees F, or 20 degrees C
  • 36% humidity

Here’s the actual (complicated) formula to calculate your standard mass flow rate:

SCFM=CFM/(Ear*(T*458.67)/Ts)

As it requires you to know the expanded air ratio (Ear) from a table, it’s probably best to use an online calculator unless you want to get really crazy with the math. Ts stands for standard temperature, or 68 degrees F.

This is especially helpful to calculate when you’re looking at compressed air systems that are basing their CFM on very different conditions than what you may be using it at. As an example, you may get a very different actual CFM if you have a high elevation with lower pressure, have very dry conditions that lower your humidity (we see you, Sonora Dessert!), or extreme temperature differences, such as Phoenix’s summer temperatures where you could fry an egg on your vehicle hood. In these situations, you may find yourself going over your duty cycle due to issues with air density,

In these conditions, knowing the SCFM allows you to calculate the kind of actual CFM that you’re likely to get out of a compressor at your location. When you have an air tool that is more dependent on the volume of air rather than the pressure per square inch, this is a very important differentiator. What are these air tools? Paint sprayers, sand blasters, powder coating guns, and similar pneumatic tools that expend air volume constantly while doing their job often require a specific volume of air flow to get the job done. If you’ve purchased an air compressor in areas with different ambient conditions than standard, you may discover that your air consumption may not keep up with your demand

However, if you use tools in a standard air-conditioned environment closer to sea level where you’ll have a higher pressure, the actual quantity of air that flows through your system will be fairly close whether you use an SCFM or CFM value, so you may not get as much difference in this type of controlled environment. If this is the case, and you’re exceeding your duty cycle because the compressor is having to work too hard to reach your working pressure, the addition of a centrifugal fan or other option to increase air flow can help increase your inlet cubic feet or inlet CFM without having to buy a new air compressor.

What is CFM?

CFM is the standard flow rate that you’ll receive in your local conditions. This is important because it can be dramatically different than SCFM based on the differences in static pressure, temperature, and humidity mentioned above, based on where your unit is tested versus your location. Being able to calculate the difference allows you to determine what kind of adaptations you’ll need to make to meet your CFM requirements at your pneumatic tools.

CFM is a measurement of inlet cubic feet per minute, or how much air density your air compressor can take in per minute, calculated using your actual temperature and actual pressure. As an example of why this is important, 1 CFM at standard conditions used at 100 PSI will equal 0.947 CFM at 3,000 feet, 0.912 CFM at 5,000 feet, 0.868 CFM at 7,500 feet, and .824 CFM at 10,000 feet of elevation, making a big difference in how much air volume your system is actually taking in to use.

This allows you to determine how much air your air compressor is taking in to determine how much it can put out to your air tools. Here’s how to calculate it:

CFM = SCFM × (14.7 psi ÷ actual pressure ) × (actual temperature + 459.67) ÷ (68°F + 459.67)

Calculating CFM is fairly straightforward as compared to calculating SCFM, so if you’d prefer to just work it out on your phone’s calculator, it’s very easy to manage. For this reason, unless you’re in extreme conditions that require you to use SCFM or you need very precise measurements, CFM will usually work fine.

Differences between SCFM and CFM

The main difference between these two systems of pressure measurement at the air compressor inlet is based on the conditions in which the measurement is taken. If you expect to be using your air compressor in an air-conditioned environment with perfect humidity at sea level with fairly stable barometric pressure, you’ll probably have very similar readings, which means that you won’t have to adapt to differences between them.

However, if you’re in very hot conditions, at a high elevation, or in very humid conditions, your CFM may be impacted from what it was originally anticipated to produce. Heat tends to make air thinner, as the molecules in the air become more excited and bounce off each other more frequently, causing them to spread out more and lower the pressure. Elevation tends to thin the air, so both of these conditions (heat and elevation) tend to lower pressure. Humidity can add a little bulk to the air, which is removed when it passes through an air dryer on the way to the lines, unless the air is dried before your system takes the air in. However, humidity’s impact tends to be lower than the other two factors.

If you’re working with very sensitive tools that have a narrow range of air flow or are in extreme environments, determining the actual CFM will give you a better idea of how those tools will perform in your environment, and will allow you to make adaptations to your system, if needed, or to select a system that will meet your needs at your conditions.

By comparison, using the SCFM that is calculated tends to work better if you’re in a more standard environment or are working with tools that have a broader range of working air flows, because a slight change in air flow at the inlet in actual cubic feet won’t impact your operation as dramatically. In these situations, SCFM and actual CFM are close enough that the difference shouldn’t impact your needs.

However, SCFM is often used extensively in scientific research, pharmaceutical production, or other high-precision needs. In these situations, setting an exact SCFM on your equipment helps to ensure that you’re getting regular, consistent results that can be reproduced exactly if needed. In these situations, the difference between CFM and SCFM can make a big difference in results, so using a standard measurement makes it easier to get the same results in each batch of work over time.

Trust the Experts of Advanced Air & Vacuum

By understanding the differences between actual CFM and SCFM, you have a better grasp of why each type of measurement is important, and how it may impact your final decision in selecting equipment for your compressed air system, as well as the final system design. You’ve also gained the knowledge to determine which type of reading should be used in which situations, making it easier to make a smarter choice when it matters most.

At Advanced Air & Vacuum, we understand the very important difference between these readings and are able to help you find the right equipment for the conditions at your specific location. That’s just one of the reasons why you’ll want to contact us for all of your air compressorvacuumpumpelectric motor, and air compressor piping needs. Why not take a moment to contact AAV today?

Categories
Blog

What Size Air Compressor Do I Need? An Informational Guide

When you’re considering purchase an air compressor, it’s important to know how to select the right size for your needs. An industrial air compressor which is too large may require a larger investment than you’re comfortable with, while one that is too small may exceed its duty cycle while trying to keep up with your rate of use.

However, there are several factors you’ll need to to consider when you’re selecting the right air compressor for your pneumatic tool selection so that you can maintain an appropriate flow of cubic feet per minute, air pressure in terms of pounds of pressure per square inch, and similar concerns. Do you need a larger tank, a portable air compressor for construction or mobile use, rotary screw compressors designed to run continuously?

In this article, we’ll look over all of the basic differences in air compressors, air tool types, tank size, and other factors that may impact your selection when choosing an air compressor for industrial applications. Whether you need something portable with a smaller compressor tank to run an impact wrench on your tow truck or something with a storage tank that can handle the compressed air volume demanded by larger tools, you’ll be able to make a smarter decision after reading this guide.

CFM vs. PSI

Let’s start with some basic measurements that are used with a gas or electric air compressor. The CFM rating has to do with how much air the air compressor is able to move over the course of a minute in terms of cubic feet of air at a particular pressure. This has to do with high-demand air tools that have a higher CFM requirement to ensure that they work properly, such as a paint sprayer or sandblaster.

By comparison, PSI refers to pounds per square inch, a measurement of pressure that is needed. Though high CFM tools may require more airflow, other tools may require a higher pressure to get the job done, such as a finish nailer set to 90 PSI to drive a nail into a hard piece of trim on construction sites. Because it only uses the air intermittently instead of continuously, it’s okay if it has a smaller tank, provided that it can reach the higher pressure needed for the air-powered tool to get the job done.

These factors can impact how your air compressor will work with your pneumatic tools. Smaller models with an electric motor may work well for most home garage or tire inflator needs, but mobile units or larger horsepower motors may require a different power supply to operate effectively, which can also impact your overall performance and installation process. For this reason, it’s important to consider not only the tank size when considering the size compressor that you need, but also the purpose you’ll put your electric compressor to in the course of operation.

Types of Air Tools

Let’s start by looking at the types of tools that are used and whether they are considered high-demand or low-demand air tools. High demand tools tend to vent the air to the atmosphere while in operations, such as a paint sprayer, sandblaster, powder coater, or texture gun. This is because the air that is released from a larger compressor with a higher tank capacity pushes the material out as it exits the air tool on a continuous basis, causing it to be used up in a higher number of cubic feet per minute.

Low-demand air tools, by comparison, may use a bit of air at a time, but it’s not as continuous. In these cases, such as a brad nailer, roofing nailer, or similar air tool, the air is only expressed a little at a time, because the air is used to drive one nail at a time, limiting how much air is exiting the system from a pancake compressor or other small compressor that is capable of reaching a higher pressure.

These different levels of demand create specific requirements when selecting an air tool. For painting or other high-demand use, you may require a stationary compressor or a rotary screw compressor that can provide a constant, large volume of air for your tools. By comparison, low-demand air tools may require a higher PSI, making a dual-stage compressor a better option because it can build a higher pressure while using a tank that has smaller physical dimensions.

Tank Size

Tank size is typically measured in terms of gallons, with seven gallons equaling a cubic foot. However, it’s important to understand that a seven-gallon tank is capable of delivering much more than one cubic foot of air per minute at sea level pressure. Because the air is compressed, your tank will hold much more air than you may expect, because it is at a higher pressure.

Generally speaking, you’ll want to make sure that the air compressor that you’re considering can deliver both the PSI and the CFM that you need for your tools to work effectively. As an example, a pancake compressor may be capable of delivering the CFM that you need but may exceed its duty cycle due to the small physical dimensions of the tank causing it to constantly run to refill it. If in doubt, always go up in tank size to allow for future growth.

Selecting the Right Size Air Compressor

Most air tools will have a specific minimum requirement for PSI, with high-demand air tools also having a specific CFM requirement. Trying to operate air tools without sufficient pressure or air flow will be very frustrating and can cause early failure of the air compressor due to cycling beyond its rated duty cycle. This type of operation can cause your air compressor to fail prematurely, costing your company a lot of money to replace it when you could have been using a slightly more expensive, larger capacity air compressor for many more years into the future.

To calculate the minimum CFM and PSI needed, determine the total needs of the tools you’ll expect use simultaneously on that system. For stations where your employees switch between tools, calculate based on the highest-use tools for each station. Add these together to determine the minimum CFM and PSI for your air compressor, then add a buffer for flexibility in the future. Don’t worry about changing out your air compressor every time that you upgrade your tool sets or add to your company’s operation!

Similarly, you’ll need to determine your tank size based on CFM needs with a buffer for low-demand tools in use at the same time. If in doubt, go with a larger tank size to meet your company’s needs without having to change your compressor in the future. In some cases, an air compressor with a three-phase power source or a rotary screw compressor may be needed to keep up with high-demand systems, making it easier for you to expand your business quickly without the added expense of a new air compressor.

If your company will be upgrading your existing tools, it’s important to include those tools in your calculations so that you don’t have to replace your air compressor as soon as you’ve added new tools to your system. No matter what type of air compressor you select, making sure that it provides at least some additional capability allows you to get more use out of your system long into the future, despite slight shifts in demand and changing needs in your business.

Shop Advanced Air & Vacuum for all your Air Compressor needs!

By selecting the proper air compressor for your company’s business, you’ll be able to not only meet, but also expand your business in the future without the expense and trouble of upgrading your air compressor at the same time. Selling air compressors of all sizes, CFM airflow and PSI pressures, Advanced Air & Vacuum has exactly what you need to keep your operation running effectively, including:

  • Large Storage Tank Capacity: Available in single and three phase power sources, the Advanced 10 HP Horizontal Air Compressor has a huge 120-gallon tank capacity.
  • Dual-Stage Compressors: The Quincy QT-54 allows you to reach higher pressures with dual-stage compression, while taking up less shop space with a vertical layout.
  • Rotary Screw Compressors: In addition to simpler configurations, our selection of Atlas air compressors exceed 30 HP, providing plenty of air flow for high-demand tools.
  • Portable Air Compressors: For the home garage, the Quincy Q12120P provides the perfect combination of professional performance and easy portability.

We also provide a range of industrial air compressor rentals, which includes oil free rental air compressor options.  If you’re wanting to try a system out before you make your purchase, we offer vacuum pump and hose rentals, too.  If you’re not sure what you’re looking for, we’re happy to help you find the perfect air compressor for your needs, all with a simple phone call. Please feel free to contact us today with any questions, for more information, or to get a quote on your next compressed air system.

Categories
Blog

How to Adjust an Air Compressor Pressure Switch

Your electric air compressor is designed to operate within specific air pressure ranges, with pre-set cut-in pressure and cut-out pressure setting options. For the most part, operating within this range, especially the cut-out pressure setting, is the best way to operate your air compressor. This is especially important when you’re considering adjusting the higher pressure end of your switch, because the rest of the system may not be rated to higher pressures and turning up the pressure can damage it if the rising pressure doesn’t trip a faulty safety valve and tank pressure gets too high. At Advanced Air & Vacuum, we always recommend having a professional look at your manufacturing sector air compressor to see what the system will bear, or if any other upgrades would need to happen before pressure switch adjustment takes place.

However, sometimes you have to replace the switch with a new pressure switch that has been set to different cut-in pressure and cut-out settings. These settings are the pressure at which your air compressor switch, a mechanical device, will turn on to increase air pressure or turn off when the higher pressure that is set is reached. Similarly, you may need to adjust the breadth of the pressure range in which your air compressor will operate. In this situation, being able to adjust your air compressor switch is an important part of operations.

This is a different process than changing the line pressure for your system and should not be confused. It’s much simpler to change your system’s line pressure, where a pressure regulator is adjusted to adapt the pressure in your feed lines that go to your tools. In this article, we’ll take a look at the steps that are taken when you are adjusting your air compressor’s pressure settings at the switch, including appropriate safety precautions to take to prevent an accident, what kind of tools you’ll need to get the job done, and the steps required to make the changes to your air pressure switch.

Air Compressor Pressure Switch Adjustments: Precautions + Required Tools

Safety Precautions

Air compressors often work on an electrical circuit, which makes it important to take appropriate safety precautions. Because the pressure switch will control the electrical current to the compressor motor, it’s vital that you follow safety measures, including wearing personal protective equipment. Turn off the air compressor and if possible, pull the plug to avoid accidental shocks to yourself, your crew, or any bystanders in the area.

You don’t need to open the drain valve, as the lack of current at the electrical contact will prevent the pneumatic pressure switch from running the compressor pump. However, if you’re undertaking these operations at the end of the day regardless, it may make sense to bleed pressure off of the system first, especially if you’ll be testing the cut-in at a lower pressure than you currently operate at. You may also want to inspect the pressure switch relief valve so that you know that it will blow off extra pressure instead of causing a blow-out if you turn the maximum pressure too high. Similarly, if the drain water from your drain valve is rusty, you may want to have your pressure tank inspected before adjusting the pressure up, as that can be a sign of corrosion within the tank.

Tools and Materials Needed

Generally speaking, the adjustment process needs very little in terms of tools and materials. You’ll need a screwdriver or wrench, depending on the type of air pressure switch that you have on your compressor. If the compressor and lighting in the area are hardwired into a breaker, you’ll need to throw the breaker, so make sure you tape it off and have alternative lighting available to be able to see what you’re doing. Depending on how long it has been since you’ve adjusted the pressure switch, you may need to use dielectric grease or an electrical solvent to get the set screw to move. DO NOT spray flammable liquids on the pressure switch while it is hooked up to an electrical current! Similarly, a bit of sandpaper or steel wool is handy if you need to clean up the switch contacts due to corrosion. If you’re rehabbing your air system, you may want to include Teflon tape if you’re replacing piping with threaded connections or need to replace gauges.

Steps to Air Compressor Pressure Switch Adjustment

Now that we know what we need and how to safely work on an air pressure switch, let’s start going through the adjustment steps of the process.

Step 1: Turn off the air compressor. For safety reasons, this doesn’t mean just work on it when it isn’t running, because it could cut in at any point. If possible, unplug the air compressor from its power supply or flip and tape off the breaker that the air compressor is powered on. You may want to drain the pressure tank and check the pressure relief valve at this time.

Step 2: Locate the pressure switch and the adjustment nut. There are two types of pressure switches, fixed range, which has one nut with an adjustment spring beneath it, and adjustable range, which will have two or three nuts that can be adjusted to change the cut-in point, the cut-out point, and the breadth of the pressure range between these two points. For a fixed range pressure switch, you can only increase or decrease pressure, while the range remains the same. Increasing the cut-out point will increase the cut-in point. Adjustable range provides a much finer degree of control.

Step 3: Identify the correct pressure range for your tool or equipment. If this is not located on the tool itself, or if it has worn off, check the manual for the factory setting for the pneumatic tool. Exceeding the recommended settings for the air tool can cause serious damage to the tool, so you’ll want to make sure you’ve got this range correct before proceeding.

Step 4: Turn the adjustment nut or adjustment screw. Generally speaking, almost any air compressor pressure system that has a differential adjustment will turn in a clockwise direction to increase the pressure, while turning the fitting in a counterclockwise direction will decrease the pressure. Similarly, turning the range nut on an adjustable range pressure switch clockwise will increase the range, while turning it counterclockwise will decrease the range. It is recommended that you leave a minimum range of 20 PSI to prevent short cycling and wear on your system.

Step 5: Check the pressure gauge and adjust as needed. Close the drain valve, pressure relief valve, and shut-off valve to your air system lines. Plug your compressor in or flip the breaker back. Turn your compressor on and see at what points it will cut in and out before putting pressure out to your system. By keeping pressure localized, you can speed up the rate of compression and the testing process, because the system will not need to pressurize all your lines before you reach the cut-out point.

Step 6: Test the compressor and adjust again if necessary. Check the pressure at the gauge and again at the tank to ensure that they match up. Are they where they need to be? If the pressure is outside your ideal range, take the time to adjust again. If you record the pressure between tests and note how far you’re turning the adjustment nut or nuts, you can get a better idea of how much adjustment will be needed to reach that range.

Step 7: Turn on the compressor and monitor for any issues. After you’ve reached the ideal range for your air system, open the valve to the rest of your air lines. Connect tools and make sure that they work well with the pressure settings and make any additional fine-tuning adjustments at the pressure regulator to your overhead line system or at the tool itself, depending on your setup. Once your system is fully pressurized, listen for hissing sounds that may indicate leaks or poor connections, and repair them as needed.

Advanced Air – Your Provider of Industrial Air Compressors

Whether it’s part of your retooling process, rehabbing an older industrial air compressor, or simply changing out an air pressure switch that has failed, going through the steps properly ensures that your company will get good performance out of your air compressor for many years to come. However, in some situations, a simple adjustment may not provide enough of a change for your operation to work smoothly.

At Advanced Air & Vacuum, we’ve spent the past two decades creating outstanding air systems for industrial, manufacturing, and factory needs. With a short chat on the phone, we can find the right solution to your air compressor woes, whether it’s upgrading part of your system, making a simple repair, or providing you with the right air compressor for your company’s needs. Please feel free to contact us with any questions.

Categories
Blog

Best Pipe for Air Compressor Lines

Running your shop or facility on compressed air hoses can be a great way to get your business off the ground initially, but it’s not a great long-term solution. They’re messy, can cause issues with catching on items, and can cause serious safety risks. For better occupational safety, getting those hoses off the ground in favor of air pipe that can be run overhead to drop points makes it easier for employees to avoid tripping over an air compressor line that wasn’t there a minute ago. This can make a big difference in your shop’s operations, keeping your workers safe and production moving efficiently.

But what kind of air pipe should you use? There is a wide range of available options that you could turn to, from the cheap and dangerous, to expensive and long-lasting options, to the gold standard that won’t cost you a mint, saving your budget significant harm without requiring replacement every few years. In this article, we’ll cover all of the popular types of compressed air system piping that is available to the market, including some that you should avoid at all costs to prevent injury to personnel or damage to your pneumatic tooling

Common Types of Piping used for Compressed Air Lines

There are many kinds of air pipe you can put to use, including copper piping, plastic piping, aluminum piping, stainless steel piping, and black iron piping. But while some of these are an excellent choice for your shop, others will have a prohibitively high cost and yet others will have safety issues or cause rust contamination in your pneumatic tooling. Let’s look at the most common types of air pipe available for running compressed air lines from your rotary screw compressor in your compressor room to your pneumatic tooling drop lines so that you can select the best pipe for the job.

Black Iron or Steel Pipe

Let’s start with the old standby, one of the first types of metal pipes used in air distribution. There are three different types of ferrous pipe, including galvanized, black iron, and stainless steel pipe. Galvanized should be avoided at all costs, because the anti-corrosive zinc lining can flake off and wreck your pneumatic tooling. Black pipe doesn’t have the galvanization, but instead can rust if exposed to moisture in your air piping from your air compressor, causing rust contamination in your tools. Stainless steel pipe is a better option, as it has significant resistance to corrosion, but is also more expensive to purchase and install. In any case, the ferrous air pipe will be heavy, require expertise to weld or connect with fasteners, and will have potential failure points at those connections.

Copper Pipe

There’s something beautiful about a shop with its air supply plumbed in copper pipe in a steam-punk kind of way, and its resistance to high temperature, reliable air flow, and smaller inner diameter (i.d.) to outer diameter (o.d.) ratio means it takes up less space than thicker, larger pipe options. It’s also lighter weight than iron pipes, has strong natural corrosion resistance in all but the most hostile environments, and it’s fairly easy to obtain fittings for your system at a local store if you need to make a quick repair or expand your system to one or two more workstations. However, the additional expense of copper pipe often outweighs the many benefits that this material brings to the table. Given that the price of copper in the commodities markets is showing no sign of dropping after the last several years, this can make this type of air pipe above many shop budgets.

Aluminum Pipe

Though originally difficult to find and more expensive, aluminum pipe has become much more popular and lower in cost for compressed air systems in the past two decades. Commonly used for construction or retrofits in industrial plants, high-quality aluminum piping is very cost-effective, lightweight, and corrosion resistant. This makes them ideal for consistent air flow and fast installation, because they don’t require the complex installation processes of copper or ferrous piping systems. It’s also very resistant to leaking, comes in a wide range of sizes, and deals well with a range of different temperatures. Though it may not be as freely available as other options, it’s well worth the weight to plumb your air distribution system in aluminum.

PVC Pipe

PVC piping can seem like a great, inexpensive option for handling compressed air lines given its lower energy costs to produce, causing a lower overall acquisition cost, but these plastic pipes hold a dangerous secret that can shortcut your company’s success. As exposure to oil, heat, and the passage of time increases, PVC lines become more and more brittle, degrading to the point that the cheap, reliable lines you’ve used the past year or so suddenly give way. Instead of simply splitting and causing a pressure drop, the PVC shatters, creating tons of sharp, jagged shrapnel as it blows out in every direction, dropping pressure and injuring workers. For this reason, the Occupational Health and Safety Administration (OSHA) as well as other occupational health administration agencies have prohibited the use of PVC pipe in compressed air lines. This same caution should be used with plastic flexible tubing, which may also age poorly.

What Size Pipe should I use for my Air Compressor?

Generally speaking, most piping sizes for your compressed air system will be based on how many cubic feet per minute (CFM) your system will be using at its highest production demand point. If you’re planning a future expansion, start with your expected usage rather than actual usage to provide a buffer and allow simple expansion, rather than replacement, of your compressed air piping. These measurements are based on the inner diameter of the pipe, which makes the pipe’s thickness irrelevant to the volume of air that is moved.

  • 1/2″ piping: up to 25 CFM
  • 3/4″ piping: 25 to 50 CFM
  • 1″ piping: 50 to 100 CFM
  • 1-1/4″ piping: 100 to 200 CFM
  • 1-1/2″ piping: 200 to 400 CFM
  • 2″ or larger piping: over 400 CFM

By keeping within these piping ranges, you’ll be able to enjoy constant compressed air pressure at your pneumatic tooling systems without suffering regular pressure drops and the impact that can have on your production process. If you’re dealing with tight spaces, you’ll want to consider your compressed air piping material carefully, as thicker-walled material such as iron and plastic pipe will take up more space than thinner-walled copper and aluminum piping.

Compressed Air Piping with AAV

When you’re trying to find the best compressed air pipe for your needs, it can be difficult to make sure you’re making the right decision. At Advanced Air & Vacuum, we’ve spent the past two decades helping our customers find the right solutions for their businesses. For this reason, when we find a truly remarkable product for our industry, we work hard to make sure we can secure suppliers for our customer’s needs. Among those remarkable products is the Prevost Piping System, a compressed air system based on 100% aluminum materials.

By creating a solid air compressor network that is built to stand the test of time and provide constant, high pressure air flow to each of your workstations, the Prevost Piping System is lightweight and more compact, with PPS1 aluminum fittings to provide a more resilient air supply system. It features exceptional mechanical resistance to both average daily pressure as well as to impacts that would damage lesser materials. It’s also resistant to compressor lubricants and oils, preventing damage to your system if a change is made. Featuring an exterior epoxy paint and an interior treatment, the aluminum alloy piping is well-protected against any oxidation or corrosion risks.

The Prevost Piping System is completely modular and scalable, with the PPS1 fittings making upgrades and changes very easy to pull off due to its adaptability. To assemble your system, the lightweight aluminum piping is simply lifted and inserted into the fitting, and the strong PPS1 fitting is then tightened around it, creating a strong, leak-resistant connection. Developed with the company’s patented design, the PPS Grip Concept ensures that you have a flawless connection and zero leaks, making it easier to avoid pressure loss in your air flow. Because the inner pipe surface is perfectly smooth, there is a low level of friction and a larger internal diameter, allowing you to move more air without turbulence in the same space as other types of piping.

If you have any questions about selecting, installing, and maintaining the right pipe system for your compressed air needs, in addition to design assistance for your piping layout to gain the best possible performance, the experienced professionals at Advanced Air & Vacuum are ready to help. Please feel free to contact us today with any concerns, for more details on the right compressed air system for your business, or to get a quote on a high-performance compressed air pipe system for your company’s needs.

Categories
Blog

Air Compressors for Car Detailing: A Guide

If you do a lot of auto detailing, you know that an air compressor can be very handy, from interior detailing such as cleaning floor mats and fabric upholstery to adding pressure to steam cleaning processes in the vehicle engine compartment. The professional detailer knows that the difference between the care and attention they give to every square inch of the vehicle is vital to their business, because otherwise the owner may as well just go to the car wash for their cleaning needs.

The enormous power that is available in an air compressor moves many cubic feet of air into a high-pressure system, making it much easier to blow debris out of tight spaces in a car interior. One might say that an air compressor is just as essential to the professional detailer as a microfiber towel, vacuum cleaner, or similar detailing tools. It even works well for mobile auto detailing professionals, with many options available to help keep your operation running efficiently.

In this article, we’ll go through the details of why a vehicle shop may need an air compressor, different types of air compressors available on the market, and how to select the perfect air conditioner for your professional detailing service.

Why Would a Vehicle Shop Use an Air Compressor?

Providing constant air pressure to a range of different activities in the shop, an air compressor is a vital tool in many automotive businesses, and for detailers, they can be used to blow dust out of hard to reach areas in car upholstery, cup holders, door jams, and similar tight spaces in a vehicle. It can also be used for exterior detailing, such as cleaning around door panels, operating pneumatic tools, or providing power for headlight restoration. Overall, having an air compressor to assist in the detailing process makes it much easier to give the customer a pristinely clean car at the end of the process.

A few examples of how an air compressor helps keep your business moving:

  • Car painting: An air compressor provides an unbelievably smooth finish, especially to clear coat paints that can be somewhat fussy.
  • Tire inflation: You want to leave customers feeling they got an amazing value and checking tires on the way out is one way to do that.
  • Cleaning your engine bay: Dirt and grime are endemic in auto shops and being able to blow dust out the overhead door makes cleanup simple.
  • Drying off a car: Bumpers, side mirrors, hood vents, grills and similar areas are notoriously stubborn to get dry. Blow the excess moisture out.
  • High Pressure cleaning: Nothing gets dirt out of tight places like using high pressure, and the right air compressor helps make that happen.
  • Powers a car cleaning gun: Whether you’ve got a Tornador Z-010 or similar cleaning tools, you’ll need an air compressor to power it.

Types of Air Compressors for Car Detailing Available at AAV:

There are two different types of air compressor you can use for car detailing, a rotary screw compressor and a piston compressor. Let’s take a look at each type:

Rotary Screw Compressors

What are rotary screw compressors?

Rotary screw compressors provide constant air pressure by keeping the mechanism in motion constantly, with no downtime in the duty cycle. This type of compressor is very reliable and can provide a high airflow in terms of cubic feet per minute (CFM), but also tends to be a bit more expensive.

How do they work?

A rotary screw compressor is operated by trapping air between two rotors or interlocking helical screws. The volume of air that is trapped between these two screws will gradually be compressed, providing a constant source of compressed air.

Because of the simplicity of design, rotary screw compressors tend to be very reliable and provide a constant stream of pressurized air, which can be a boon if you’re dealing with air tools that use a great deal of air flow, such as a painting rig.

Use cases:

  • Powering air tools
  • Inflating tires
  • Running spray guns

Piston Compressors

What is a piston compressor?

By comparison, a piston or reciprocating compressor uses an electric motor to compress air that has been taken into a cylinder, which is then moved into a large capacity bottle or tank. From this tank, the pressurized air is then moved through hoses to tools and similar equipment. Though both terms are correct, most in the industry use the term piston compressor.

Piston compressors are found in two primary configurations:

Single Stage Compressors

Designed for intermittent use, a single stage compressor uses one cylinder to compress the air. For this reason, it’s only able to reach lower pressures. They tend to work very well for smaller shops, individual workstations, or personal use. Due to their smaller size, capability, and simplicity, they tend to also be the least expensive type of air compressor on the market. They work well for inflating tires, cleaning shops, operating lower-power air tools, and similar applications.

Two Stage Compressors

By comparison, a two stage compressor is designed for near-continuous use. The two stages in this type of compressor refer to two cylinders, one larger and one smaller. The larger cylinder fills with air which is compressed by a piston and moved into the second, smaller cylinder. The second cylinder is then also compressed by a piston, after which point the air is moved into the storage tank. This process allows the air to be compressed to a higher pressure, making it more suitable for ongoing use as well as in higher-powered applications such as painting, sanding, and similar applications. However, due to the larger number of moving parts, they are typically more expensive to purchase up front, but have a lower overall maintenance cost due to less frequent maintenance being required.

Choosing an Air Compressor for Car Detailing: Things to Consider

There are many factors to take into consideration when selecting the right air compressor for your detailing needs.

Size

Size can refer to two different factors. The first, the weight of the air compressor, has to do with how stable it will be in operation. If you run a mobile service, you may want to go with a lighter horizontal-orientation air compressor, which will be more stable but still movable by the average worker. If you have a centralized shop, you may want to choose a heavier vertical-oriented air compressor that will remain stable while taking up less floor space.

The second factor has to do with tank size. The size of the air compressor tank will determine how much air it can move into the system during its duty cycle. If you’re considering a two cycle piston air compressor, you may get by with a smaller tank at a higher pressure than you could with a single stage air compressor. Air compressor tanks are typically measured in gallons.

CFM

Though air compressor tanks are measured in gallons, the amount of air they can move is measured in cubic feet per minute. This has to do with how much air can be compressed constantly by the air compressor if it’s running wide open.

PSI

PSI stands for pounds per square inch, which is a pressure measurement. A two stage compressor can handle higher PSI than a single stage, providing higher pressure to get the job done.

Portability

As mentioned under size, a heavier air compressor is better for a large shop, while mobile services will want to use a smaller air compressor that will often be easier to move.

Best Air Compressors for Car Detailing

CR7.5 Gas Powered Air Compressor: The Most Reliable Piston Air Compressor

Featuring a two-stage compressor, 30-gallon tank size, 7.5 horsepower motor, and a flow rate of approximately 23.5 CFM at 100 PSI and 22.6 CFM at 175 PSI, the CR7.5 is the most reliable piston-based air compressor we stock at Advanced Air. It works very well for many larger shops, but may be too heavy if you need a portable unit.

Quincy Portable Air Compressor

If your operation is in need of a smaller, more portable option, this single stage air compressor from Quincy is a great option to consider. It can generate a maximum of 7.4 CFM at 135 PSI, features a 20-gallon powder-coated ASME tank, runs on 115V AC with a 2 horsepower motor, and is a great option to consider for most portable operations.

As you can see, there are many factors to consider when selecting your air compressor, whether you’re using it as a simple leaf blower for your shop, need something to move cleaning liquid deeper into the carpet, have to have something with enough power to handle the perfect ceramic coating, or just want a simple, oil-free pump that requires virtually no maintenance. At Advanced Air, we’re happy to help you find the perfect option. Please contact us today to get started!

Categories
Blog

Direct Drive vs. Belt Drive Air Compressors

Whether you’re driving pneumatic tools or want to improve energy efficiency in your operation, the type of air compressor you purchase can make a big difference in the performance you’ll receive. Though many larger operations will go with a rotary screw compressor to provide tankless operation, many companies find themselves puzzling out the differences between direct drive units and belt-driven models when trying to make a decision between the types of air compressors available on the market.

In this article, we’ll get into the fine details and differences between these types of air compressors, whether you’re using a portable compressor or a stationary compressor for your operation. We’ll look at the advantages and disadvantages between a belt drive air compressor and a direct drive model, so that you can determine which is the best option for your needs, including initial investment, compressor performance, which has less maintenance, noise level, and similar aspects. Let’s get started.

Direct Drive Air Compressors

What is a direct drive compressor? A direct drive air compressor directly connects the motor to the compressor pump using a crankshaft. This direct transmission of power doesn’t limit the compressor to single-stage compressor operation, however, with two-stage compressors available with a direct drive power system.

Advantages of Direct Drive Air Compressors

Because they have fewer moving parts, direct drive air compressors are low maintenance, with fewer parts to wear and require replacement. This means that you’ll have fewer failure points than a belt-driven compressor and overall maintenance costs will be lower with less downtime.

This simplicity also means that it will do better in harsh environments, holding up better to extreme temperatures than its belt-driven counterparts. This makes a direct drive air compressor a better option for hot and cold weather, where belts can be impacted by the temperature. This represents the overall ruggedness of direct drive compressor options.

Direct drive air compressors also have higher levels of efficiency in operations, as there is no loss of power transmission in the belt. This allows you to get more energy from every cycle than you would receive from a belt drive compressor.

Disadvantages of Direct Drive Air Compressors

However, as with any list of benefits, direct drive compressors also have drawbacks. Because of the direct connection between the electric motor and the compressor pump, this compressor type tends to be much louder than a belt drive compressor.

The other issue that can arise is higher repair costs. Because there are fewer parts to fail, if one part does fail, it typically has a much higher cost of repair, because it is more integral to the overall operation of the direct drive compressor, such as a shaft seal at the connection points for the crankshaft.

Because the direct drive compressor must be constructed to higher initial standards to hold up in a wider range of environments and with fewer moving parts, it will often have a higher initial cost as its final disadvantage.

Common Applications of a Direct Drive Air Compressor

If you’re in a situation where you’ll need significant cubic feet per minute (CFM) and a large air compressor to keep your air compressor in operation, a direct drive rotary screw air compressor will generally provide the best outcomes for your operation, due to better energy efficiency, continuous operation, and lower downtime.

Belt-Driven Air Compressors

By comparison, a belt drive compressor uses a belt to connect the electric motor to the drive pump using a pulley system, which may include other items being powered such as an exhaust fan.

Advantages of Belt Drive Air Compressors

A belt drive air compressor will provide greater flexibility to your operation, allowing you to adapt to variable speed by changing out the pulley system for different-sized pulleys. This allows you to change how much air flow and pressure you can pack into your storage tank.

The fewer direct connection points of a belt drive compressor mean that this type of compressor will be less noisy than a direct drive compressor, making it more suitable for an indoor environment where the air compressor can’t be removed from the work area.

Because they don’t need to be as hardy as direct drive compressors, you’ll often find that belt drive compressors are less expensive initially than their direct drive counterparts, making it much easier on the budget for the initial investment.

Disadvantages of Belt Drive Air Compressors

Because the belt drive compressor uses a rubber belt to drive the compressor pump, the belt must remain at the proper tension. This means that at extreme temperatures, you may find that there is too much slack or too much tension in the belt, which impacts appropriate operation. This limits the range of temperatures in which it can operate.

Because the belt is made of a flexible material, there is some loss of efficiency in a belt drive air compressor, as there will always be some slippage given the properties of the belt material. Changes in temperature can impact this, making the belt slide more as the belt relaxes in higher temperatures, making the proper tension of vital importance to efficient operations.

Finally, the additional wear points will require more maintenance and more frequent downtime than direct drive systems, impacting your operational efficiency.

Common Applications of Belt Drive Air Compressors

A belt drive compressor will do best when flexibility is needed in an operation. If you need to push lug bolts with your crew this week and push paint the next, being able to rapidly change out your CFM and PSI by simply changing pulleys and belts can be a huge advantage. Belt drive systems also tend to be more portable, making them easier to move from point A to point B.

Belt Drive & Direct Drive Air Compressors: Which is Right for You?

Though you’ll need to consider all aspects of your operation, there are some differences between these two types of compressors that may stand out and help make your decision easier. As an example, temperature, maintenance, downtime, budget, or similar aspects may play a strong role in your selection process. To help you decide, here are a few factors to consider:

Use Frequency

If you only need to use an air compressor every once in a while, a belt drive will typically suit your needs much better, due to its lower overall cost and need for regular maintenance and downtime. For frequent to continuous use, the direct drive will be a better option, as it is designed to operate on a near-continuous basis with lower downtime and infrequent maintenance needs.

Budget

If you’re on a tight initial budget, a belt drive will work better, giving you a lower starting budget to get your air compressor into operation. However, if you’re concerned about your long-term operating budget, a direct drive will have lower maintenance costs down the road, often giving you a lower overall cost over the lifespan of the air compressor.

Maintenance

If you need to limit downtime on your line, a direct drive system that requires fewer maintenance tasks carried out on it is a better option than a belt drive, which will require more frequent services. The direct drive system will also have a longer overall service life, requiring less frequent replacement and providing a higher level of reliability than a belt drive system.

Environment

The environment that your air compressor will be used in can also impact the type that you should purchase, with harsh conditions and extreme temperatures causing problems for some air compressor types if it’s used there on a regular basis. For an ideal solution in a harsh environment, go with a direct drive system that has fewer wear points and maintenance requirements, rather than a belt drive air compressor that will not do as well in extreme temperatures below freezing or in very hot conditions.

Contact Advanced Air for Your Industrial Air Compressor Needs

Whether you’ve decided on the exact air compressor you need for your operation or need assistance deciding whether a belt drive air compressor or direct drive air compressor will be best for your company, Advanced Air & Vacuum can help. Our team of experienced professionals has worked in a wide range of industries, and knows what will work best for your operation. Please feel free to reach out today with any questions, for more information, or to get a quote on the perfect air compressor system for your business.

Categories
Blog

How to Quiet an Air Compressor

Pressure Gauge on an Air Compressor

Though air compressors can be a very handy tool and pneumatic power source, they can also create a high noise level, making the search for a quiet compressor important to many business owners. However, just because you’re on the hunt for a quiet air compressor doesn’t mean that you have to have a lot of noise in the meantime. This article will delve into the causes of noise in a loud compressor, how to use different tools and techniques to quiet your air compressor, and what types of air compressor are the quietest to begin with.

How Loud are Air Compressors?

With the usual decibel range of a vacuum cleaner, an air compressor can be rather noisy. Used to power a pneumatic tool, air tool, air up car tires, or push paint or other material through a sprayer assembly, a silent air compressor is practically non-existent. However, that doesn’t mean that you can’t enjoy normal conversation in your shop without the loud noise of your portable air compressor operating in the background.

But let’s start by talking about how sound volume is measured. Sound output is measured in decibels, which increase on a logarithmic scale. A decibel is the smallest change in sound volume that the human ear can detect. Using the scale, this means that a 40-decibel sound is 10 to the 4th power louder than a single decibel, or 1,000 times louder. In some situations, a decibel meter may be used to measure noise pollution in an environment, determining at which point hearing protection should be required of workers to protect their hearing.

Though some air compressors, such as rotary screw compressors, are by nature low noise generators, using a circular motion of a screw to compress the air into the system, most air compressors, including both a portable compressor and stationary compressors, create a lot of noise in industrial application. For that reason, taking steps to reduce noise in the work environment is important both to worker health and occupational safety. In this next section, we’ll discuss some of the ways you can reduce noise in your industrial application.

How to Make Air Compressor Quieter

The amount of noise that is generated in industrial applications can be bothersome, making normal conversation difficult and the work environment dangerous as workers fail to hear potential hazards due to the noise level. The powerful motor that runs the air compressor can create a lot of noise in and of itself, as can vibrations, the air intake, and other parts of the air compressor.

Air compressor noise reduction can happen in multiple ways, from an intake silencer to a soundproof enclosure, and all attempts at noise reduction make your shop a more pleasant place to work. Here are some of the top ways you can improve noise reduction in your industrial application.

Soundproof Box for Air Compressor

One option is moving your air compressor out of or away from the workspace. This can include building a soundproof box, complete with concrete block and acoustic foam. An intake muffler can generate less noise that would otherwise escape through the intake needed to keep air moving into the compressor.

However, when planning your acoustic barrier, remember to include a certain number of cubic feet within the enclosure, especially for air-cooled motors. You can also place rubber grommets between the feet of your stationary air compressors and the slab they’re mounted to so that vibrations don’t pass along the slab to generate more noise and vibration throughout the shop. You should also ensure that adequate ventilation is available to help keep your air compressor cool to ensure a long workable lifespan.

Air Compressor Sound Blanket

But what if you can’t create a soundproof box to enclose your air compressor? Hanging a sound blanket around the air compressor saves room while causing noise reduction to happen, which you could back on the outside with stainless steel bars to prevent it from being pulled into the intake muffler.

In addition to hanging sound blankets at the sides of your industrial air compressor, you can also include them over the top of your air compressor to further reduce and control noise in your industrial application. Rubber grommets can be placed between your air compressor and the slab it’s mounted on as well, or rubber mats can be placed beneath it, to help reduce the noise that is caused by vibration on the slab.

Perform Regular Air Compressor Maintenance

Regular maintenance can also impact how loud your air compressor can be. Maintenance helps your air compressor run more smoothly, reducing how much noise it generates. These steps should include:

  • Check lubrication levels on a regular basis. This system is typically laid out in your air compressor’s manual or on the manufacturer’s website. As mentioned above, an air compressor that requires oil changes will be quieter than an oil-free air compressor. Try to keep spare oil on hand so that you’re not caught short when you need it most.
  • Place the air compressor on a rubber mat to absorb vibrations and check the mat’s condition regularly. Because the vibration caused by the air compressor will cause mats or grommets to be moved against metal or concrete, it can cause significant wear on these parts. Consider keeping spares on hand.
  • Keep air filters clean and change them often. Again, your manufacturer’s website or manual is the best place to reference this information, but it’s especially important if you’re in a dry, dusty climate that can cause dust to build up on the filters quickly. If you can, try blowing the dust out of the filter outside to get more use from it, and always keep spares on hand.

Use a professional maintenance service. Because professional maintenance technicians also manage repairs, they’re a good person to have on hand to spot issues that may arise in your air compressor, allowing you to catch problems early on when they’re easy to fix rather than later when they’ve become a serious issue.

Choose a Less Noisy Air Compressor

Though all air compressors will generate some amount of noise, some types will generate less noise from the beginning, making it easier for you to create further noise reduction in your workshop or industrial application. These include:

  • Compressors requiring oil changes
    • An oil-free air compressor is typically louder than its oil-change-required industrial models. Part of this is because industrial air compressors will typically include better construction than an oil-free compressor, such as stainless steel versus mild steel parts, and take steps to reduce the amount of noise generated by the compressor. Don’t give into the urge to go low maintenance with an oil-less compressor! One great option to consider is the Atlas Copco CR5 to 7.5 Vertical 80-Gallon Air Compressor.
  • A rotary screw compressor
    • Rotary screw compressors run constantly, but do not make as much noise, because they constantly generate pressured air instead of trying to “catch up” the tank so that it can take time out of the duty cycle. Towards that end, they tend to have fewer revolutions compared to piston-driven tank models and show a related 10 to 15 decibel drop in noise level, typically topping out at 70 to 75 decibels compared to the 85 decibels that are more normal for piston-driven air compressors. We recommend the Atlas Copco G7-15 series of rotary air compressors to meet your needs.
  • A larger-capacity compressor
    • Though this doesn’t necessarily reduce the noise of the air compressor, it can reduce how often it needs to be operated to fill the storage tank. By increasing the tank capacity, the air compressor will have to operate less frequently to fill it, remaining quiet the rest of the time. This can make it much quieter in your shop the rest of the time and is a great option to consider if you’re planning a shop expansion down the road that may require a larger compressor to begin with. We recommend the Atlas Copco two-stage CR10 and CR15 series, which features a 120-gallon storage tank. (Read more about two-stage air compressors here!)

Advanced Air’s Quality Air Compressors

By starting with a high-quality industrial air compressor from your local Arizona or California air tools supplier, you’ll get much higher quality than you would from a hardware store air compressor. Because an industrial air compressor is built to withstand demanding environments, they’re often quieter from the beginning, due to the superior construction and materials used in creating them.

At Advanced Air & Vacuum, our highly trained team of technicians gives you a multi-faceted approach to finding the perfect air compressor for your business, installation process, and continued service and maintenance for many years to come. Our dedication to our customers is second to none. Please feel free to reach out today with any questions, to get more details on our outstanding lineup of air compressors and accessories, or to get a quote on your next air compressor project.

Categories
Blog

What is the Best Air Compressor for Spray Painting Cars?

When your business is spray painting car bodies, you need an air compressor that provides steady compressed air at continuous air pressure. You’ve invested a lot into your auto body operation and having the best air compressor is often as important as having the perfect HVLP gun to get the right finish. This means that not just any air compressor will do. How do you find the perfect size air compressor for your operation? In this article, we’ll look at factors you should consider, air compressor features that will impact your operation, and some of the best air compressors for your needs.

Factors to Consider

man-spray-painting-red-car

To start, let’s look at what your needs are to ensure that you’re getting the right air compressor for your requirements.

CFM

Many individuals who work with multiple pneumatic tool types may not realize the importance of CFM, or cubic feet per minute, in determining the appropriate type of air compressor for their needs. However, automotive painting requires not only constant pressurized air, but also specific quantities of it. A small compressor may be able to provide sufficient compressed air for operating a wide range of air tool types, but because a paint sprayer provides continuous flow to deliver the best results, it requires a much higher volume of air on a regular basis. If the spray gun were only used for a few seconds at a time, a small compressor might be able to do the job. Still, paint spray processes often require the paint gun to be used continuously for longer periods of time during the painting job to ensure that the car paint comes out with a similar texture across the entire vehicle.

Air Pressure

When using spray guns for large projects such as auto painting, the air pressure must be high enough to provide consistent results. Low pressure can put the paint droplets on in too large of a size, preventing the paint from laying down smoothly or causing runners to form. Your sprayer will come with specific requirements that should be followed carefully, both in terms of volume per minute, or airflow, as well as air pressure, or PSI. Having the right air pressure ensures that you can complete your auto painting project smoothly and effectively, providing a high-quality finish to the vehicle you’re working on. However, if you’re going to be using another pneumatic tool or tools at the same time off of the same air compressor, it’s important to keep their total air pressure and airflow needs in mind when selecting your air compressor to prevent pressure drops when a new air hose is attached to the compressor, or another high-flow pneumatic tool causes a low pressure situation to form in your shop.

Tank Size

If you’re wondering how large of a tank you’ll need for your automotive painting operation, both the best and most annoying answer is “it depends.” How many paint guns will you be running at the same time? Will you be running other pneumatic tools at the same time? From that information, you can calculate your absolute maximum air demand and then add a buffer, just in case you get a new air tool or paint gun that has higher demand than the previous one. From there, you can calculate how big of a storage tank size you’ll want to have available for additional air storage. You should also take into account the duty cycle of your air compressor so that the air stored in the tank provides sufficient flow and pressure to keep your shop moving while your air compressor is resting.

Horsepower

The horsepower of your air compressor is often tied in with other common factors, including the stages, type of compressor (more on that in a few moments), tank size, overall pressure, overall airflow, voltage, and similar issues. Overall, you’ll want to have an air compressor that is capable of around 3 horsepower for single-tool operations, such as one-man shops where only a single tool is used at a time. For multi-person shops, 5 horsepower is a minimum, and large shops will want a production air compressor of 10 horsepower or much larger, depending on how much production you push through on a daily basis. Horsepower is tied to the common factors mentioned above, as larger horse motors will require higher voltage while providing higher pressure, airflow, and larger tanks.

Which Type of Air Compressor Should I Use?

different-types-of-industrial-air-compressors

Single vs. Two Stage

If you’re a hobbyist or a very small shop, you may be able to get by with a single-stage air compressor system, provided that it’s large enough to keep up with your paint sprayer gun. You’ll still want to go with a compressor that has a larger storage tank and higher horsepower to be able to keep up with airflow and PSI demands. However, if you’re doing end-to-end bodywork with just yourself or one other individual in the shop or can split the work so that there is minimal draw-down of the air compressor during your painting operations, you’ll be able to keep up with your work with a single-stage compressor with a bit of creativity. These air compressors also nearly always use 115V power, reducing the need for you to have to rewire your shop to be able to use the air compressor. This can be a big boon to someone who is starting out their business in their garage but may need to be remedied down the road to expand your business operations to a professional shop.

Generally speaking, to get more out of your storage tank, you’ll want to look at a two-stage compressor over a single-stage compressor. This is because a two-stage or dual-stage compressor will take two steps to provide further compression of the air, reaching pressures as high as 175 PSI. They also tend to have longer duty cycles, as well as a range of features built in to help you work longer and easier, which is one of the main reasons for having a solid air compressor system in your shop to begin with. Dual-stage compressors meet a wide range of needs, allowing you to run your entire shop from a single compressor. However, you may need to install a special electrical service, as many two-stage air compressors require 230V power, and those that do not will still often require a switch to 20-amp service in 115V power, requiring a new plug, and sometimes new wiring, to be run to the breaker box for operation.

Rotary Screw Compressor vs Reciprocating Air Compressors

If you’re wondering about the differences between reciprocating air compressors versus rotary screw compressor systems, you’re not alone. As you reach higher levels of demand on your air compressor system, you may want to make the change. The single and two-stage compressors mentioned above both use pistons that reciprocate, or move back and forth in their shafts, to compress air. This provides a relatively simple way of compressing the air before it is moved into the storage tank for future use. However, rotary screw compressors can be a boon for high-demand systems, especially when maintaining consistent air pressure and flow is of vital importance for your spray guns.

A rotary screw compressor rotates to compress air and move it into your compressed air lines, essentially creating pressure and flow during the motion and providing superior performance for your operation. This type of air compressor typically drives large quantities of air in a continuous, highly pressurized manner. Because it has a very short rest, if any, rest period during its duty cycle, rotary screw air compressors are considered the gold standard in the industry, providing the most reliable air for pneumatic tools. If you have the ability to switch up to this type of air compressor, it is highly recommended in the industry.

The Advanced Air Difference

When you’re working with Advanced Air & Vacuum, you’ll get the best possible service, information, and assistance in the industry. Our many years of experience in the area means that we can provide you with solid solutions to your needs, from compressed air piping to industry-leading advice. We stand behind our products and ensure that you’ll get the right products for your needs. For automotive painting, we recommend the following products:

Ready to get started with the perfect air compressor for your auto body shop’s needs? We’re ready to help. Please feel free to reach out to Advanced Air for more details, with any questions, or to get started on a smart design that will keep your operation in motion.